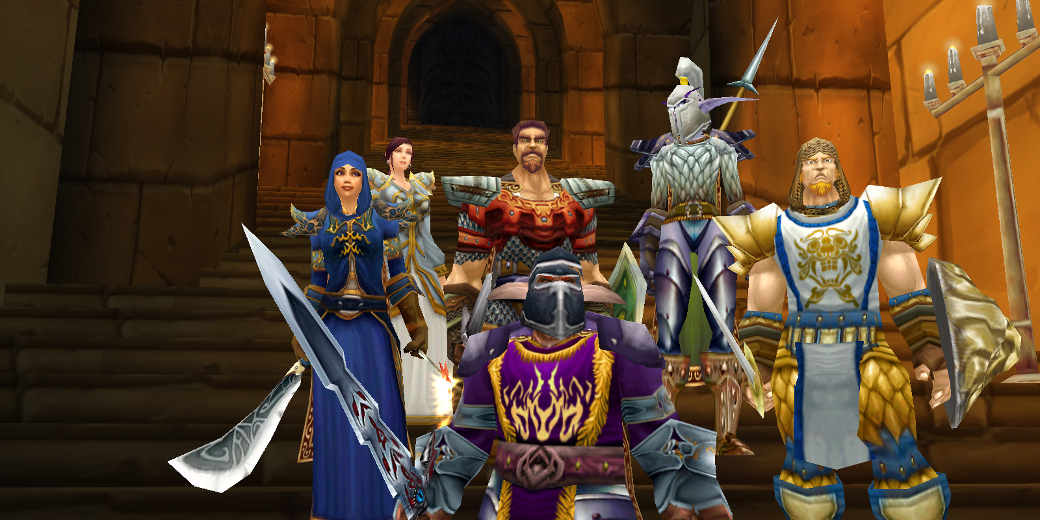
You may have heard of World of Warcraft (WoW). It’s one of the biggest MMORPGs (Massively Multiplayer Online Role Playing Games) out there and it’s been going strong for about 10 years now. There’s a reason it’s remained so popular for so long; WoW is a very well designed game, and part of that is how much fun it is to play with others. If you’re looking for a game to play with one or more friends or family members, then WoW might be right up your alley. (Especially if you have relatives who live far away, say at college.)
First of all, don’t be fooled by the name. WoW does not contain graphic violence. You kill monsters and engage in battles with other players, but WoW is also about questing and strategy. It’s been used in schools to teach team-building and leadership skills. Like other online games, it lets you communicate with your group (and other players) using text or headsets. Playing WoW is a fun way to spend extended time with family and friends across distances.
When I started playing with my mom and sister a few years ago, we made a few mistakes—nothing too hard to fix, but these tips will help you get going more efficiently than we did. In this long post, I’ll cover:
- Step 1: choosing a server
- Step 2: creating a character (which includes choosing a faction, race, class, and role)
- Step 3: designing your group (choosing player vs. player or player vs. environment mode)
- Tips for communicating with your group
- Tips for using the WoW party system for your group
Step 1. Choose a Server for Your Group

The first thing you’ll do after you get past the login screen is choose a server. It’s important to realize that it’s difficult to play with characters on different servers, so you’re going to want to make sure that all of your playmates create a character on the same server. Recently, Blizzard has been making changes that make it possible to group and do various activities with people from different servers, but it’s probably best for now to just make sure that everyone is on the same one. (It might be good to choose a less crowded server since overpopulated servers can experience lag.) Basically, there are two different types of server: PvP (Player versus Player) servers and PvE (Player versus Environment) servers.
PvP Servers
On a PvP server, it is possible to attack other players any time you’re not in a neutral zone (which is most times). This means that while you’re out completing quests and doing other activities in game, you’re open to attack. This can be fun, because it adds to the overall sense of danger and excitement, but it can also be frustrating (for example, if you want to do a quest but someone significantly more powerful than you is “camping” in the area and killing you whenever you approach). This may sound obvious, but I would not recommend creating a character on a PvP server unless you enjoy PvP. A PvP server might be more fun if everyone in your group likes the idea, though. Strength in numbers does help.
PvE Servers
On a PvE server, your main focus will be completing quests and doing dungeons. It is not possible to attack other players unless they choose to make themselves attackable (known as being “flagged”). It is also possible to become flagged for PvP by entering certain areas that are designed for PvP or performing certain actions such as killing NPCs (non-player characters) that belong to the opposite faction. Basically, on PvE servers you only PvP when you want to, instead of all the time.
RP and RPPvP Servers
There are also RP and RPPvP servers. RP stands for role-playing. These servers are for people who like to role-play as their character. You will find guilds on RP servers that exist for people to act like their characters in game. You have to be somewhat creative to get into role-playing, as good role-players will write out their character’s origin story and motivations so they can better play the role in-game. There is no actual difference between an RP server and a PvE server other than that role-players are expected to congregate on RP servers.
Step 2. Create a Character

After you choose a server, the first thing you’re going to do is create a character. When it comes to playing the game with others, there are several aspects to consider: factions, races, classes, and roles. Of these, the important choices to consider ahead of time are factions and classes.
Factions
There are two factions in World of Warcraft: the Horde and the Alliance. Horde and Alliance players are enemies, and on PvP servers players from your enemy faction will be the players you’ll be able to attack at will when you encounter them out in the world. It is not possible for players of the same faction to attack each other even if they’re both flagged for combat except in a few specific cases that I won’t go into detail about (duels, Wargames, and Arena). So basically the factions are opposite teams, and you’ll want to make sure that you and your playmates are all on the same team. Even on PvE servers, it’s not really possible for the factions to interact with each other verbally.
Races
The Alliance faction includes Human, Dwarf, Night Elf, Gnome, Draenei, and Worgen, and Pandaren races; the Horde faction includes Orc, Undead, Tauren, Troll, Blood Elf, Goblin, and Pandaren races. (Pandaren is the only race that can be either Alliance or Horde.) While the faction you pick does matter in the context of your group, the race you pick doesn’t necessarily. Every race starts in a different zone (or home area), but it’s not that difficult to meet up with the other members of your group soon after starting the game, especially if any players your group have a little experience with WoW and know their way around the world. That said, if you’re worried about finding your way around, it might be best for everyone to start as the same race. Its worth noting that Trolls and Orcs start in the same Horde zone, as do Dwarves and Gnomes on the Alliance side.
Classes
One thing that does matter when you’re creating your character is the character class you pick. There are 11 classes in WoW: Mage, Hunter, Paladin, Rogue, Warlock, Warrior, Priest, Druid, Shaman, Death Knight, and Monk. Death Knight and Monk were both introduced in later expansions, so you may not have access to them when you’re just starting the game if you chose not to buy all of the expansions off the bat. Generally speaking, you should probably just pick whichever class is most appealing to you as your first. You might have to try a few before you find the one that you really want to get to max level.
When I started playing WoW, my first class was Rogue. I discovered that I didn’t really like the actual style of play, so I tried Hunter next and liked it enough to get that character to max level. However, once at max level I realized that I didn’t really like playing the Hunter in groups, so I leveled a Mage next. I’ve been playing that Mage as my main character since 2009. It makes sense to make sure that everyone is happy with their class before meeting up and leveling together. Level 10 is a good time to do that because the first 10 levels tend to go pretty fast compared to the rest of the game, and it’s a little easier for everyone to meet up and pick up all of the same quests. That being said, there are some things to consider when you’re creating a character that you’re planning on playing with a group. Namely, what role everyone is going to take.
Roles
In WoW and most other MMOs, there are three roles that the various classes can play: tanking, healing, and damage dealing (commonly referred to as “DPS” which stands for Damage Per Second). These roles are most applicable to PvE so I’ll talk about them in that context first, but they also have their place in PvP, which I will get to later.
A tank’s job is to get the attention of all of the monsters you may be fighting (commonly referred to as “getting aggro“) in order to protect the healers and DPS.
A healer’s job is, perhaps not surprisingly, to heal the tank and the rest of the group.
The DPS’s job is to do a lot of damage to your enemies. DPS is also generally easier and more forgiving than the other two roles. As such, you may want to have the less experienced members of your group play DPS. Inexperienced players can still have fun playing tanks and healers, but strangers aren’t always so forgiving of mistakes when it comes to these roles. A thick skin is important for tanking in more than one way.
For a normally sized PvE leveling group of five players you only need one tank and one healer—optimally everyone else will be DPS. Not every role is available to every class, so you might have to pick your class at least partially based on which role you want to fill in the group.
At level 10, you pick your specialization; for some classes, this will determine your role. For example, a Paladin has the specializations Holy, Retribution, and Protection. Holy is for healing, Retribution is for DPS, and Protection is for tanking.
Each class has three specializations, but not every class has access to every role. There is more to say about this (mainly the difference between various specializations for classes that can’t fulfill every role), but it’s probably best to let the in-game tutorials explain that. For now I will explain which roles you will want to have in your group for various styles of leveling. As I explained in my last post, the first thing you’re going to want to decide is whether your group is going to level as a PvP group or if you’re just going to focus on PvE. It’s worth mentioning that it’s also entirely possible to do a little of everything.
Step 3. Design Your Group
You could level on a PvE server and do mostly PvE activities but decide that sometimes you’d like to do some PvP with your group. That said, I’m going to talk about what kind of group makeup is ideal for each style of play.
PvE Groups
First, PvE. There are two basic styles of PvE when leveling: questing and doing dungeons.
Questing
Questing is really designed to be done solo or with only one or two other people. Here’s how it works: you go out into the world and find NPCs (non-player characters) that will ask you to do something like kill 10 giant spiders that are threatening their village. You go kill the spiders, gaining progress to the next level in the form of XP (experience points), and then you return to the NPC that gave you the quest to get your reward. Because it’s designed to be done solo, leveling through questing doesn’t really require any specific group makeup, though. If you’re not doing dungeons, the ideal group makeup for a group of qusters would probably be either one tanka nd four DPS or just all DPS. That being said, this could get you into trouble if you want to level mostly through quests and sometimes do dungeons, which is a common style of leveling.
Dungeons
A dungeon is an area that is designed to be cleared with a group of five players: a tank, a healer, and three DPS. Monsters inside dungeons are considerably stronger than monsters found in the world while questing because they are designed to be tackled by a group. As you fight your way deeper into the dungeon, you will encounter bosses—named monsters—that are even stronger than the others in the dungeons and that drop better weapons and armor.
Don’t worry too much if you don’t have five friends to play with; there is an easy way to find people to do dungeons with you. It’s called the Dungeon Finder tool (commonly abbreviated as DF). The nice thing about the DF is that you don’t actually have to have a tank or a healer in your group to use it. Evn if you and your frinds are all playing DPS, you can still do dungeons together by using the DF to find some tank and healer teammates. However, it’s worth mentioning that, because healers and tanks are in high demand, it could take as long as 30 minutes for the DF to put your group together with a tank and healer. If you have a tank, the DF almost always finds you a group within ten seconds. If you have a healer but no tank, the time it takes for the DF to find a group will vary, but is usually less than ten minutes and often faster. The important thing to remember about dungeons is that you must have a group of one tank, one healer, and three DPS.
PvP Groups
It doesn’t really matter what your group makeup is if you’re questing on a PvP server, just like it doesn’t really matter on a PvE server. Sure, there are combinations that probably work better together when fighting groups of other players, but there are so many possible combinations that work that I don’t think it’s even worth considering for something as informal as questing on a PvP server.
So let’s talk about Battlegrounds. Battlegrounds are areas that are designed for PvP. There are several different Battlegrounds with various objectives for you to compete over, so I’ll just use the first Battleground that becomes available to new players as an example. At level 10 you will be able to queue for Warsong Gulch, in much the same way that you use the Dungeon Finder to queue for dungeons. Warsong Gulch is basically a game of WoW Capture the Flag. You will start in your faction’s base with nine other players from your faction. After two minutes or so, the game will start. You can choose to either stay behind and defend the flag or to go after the opposing team’s flag. Whatever you do, I would recommend trying to stay in a group. If there’s one mistake that new players tend to make in Battlegrounds, it’s to go lone wolf and try to do things by yourself. This is even more true if you’re playing with a group of friends, because hopefully you can actually count on them to help you if a Rogue decides to sneak up on you and ambush you. If you can bring the opposing team’s flag back to your base and your team either stopped your flag from being taken or killed the enemy flag carrier and returned the flag, your team gets a point. The first team to three points wins.
As for the group makeup that you should have for Battlegrounds, there’s isn’t really one, but there are some things you might want to keep in mind. First of all, Tanks are not as important in PvP. While computer monsters can be “tricked” into attacking the Tank based on the Tank’s aggro score, other players cannot be so easily convinced. However, Tanks are still generally more durable than other players, so they’re well suited to people who like to play more defensively. They are also useful for certain jobs. In Warsong Gulch for example, it’s often smart to let a Tank carry the opposing team’s flag. Healers, however, are probably the most important role in PvP and definitely in Battlegrounds. It’s often said that in most random Battlegrounds, whichever side has the most Healers will win. A killed player will respawn after waiting 30 sconds, and that lost time can make or break the game. A team with lots of Healers can keep its comrades from falling in battle, which will help it secure the flag while the opposite team flounders in the respawn area.
Tips for Communicating With Your Group
Now that your group has decided on a server, a faction, and a general style of play, let’s talk about ways to make it easier to communicate with other members of your group in-game.
Friends List

First of all, you’ll probably want to add all of your group’s characters to your friend list. Pressing “O” will bring up your social menu on the “Friends” tab. To add characters to your friends list, you can either click “Add Friend” on the social menu or you can type “/friend <name>”. This way you will be able to tell if your friends (or your mom and dad!) are online at a glance. It is also possible to add players’ Battle.net accounts as friends, enabling you to see if they’re online no matter what character they’re playing. You can even tell if they’re playing a different Blizzard game (such as Diablo 3 or Starcraft 2) and communicate with them. This is accomplished by adding their BattleTag. You can see what your BattleTag is by opening your social menu and looking at the top. To talk to them, all you have to do is type “/whisper <your message>”, or “/w” for short.
Chat Channels
In order to make communication easier, you can also have everyone in your group join a chat channel. To create a channel, all you have to do is type “/join <your channel name>”. Tell the other members of your group to do the same and you’ll all be able to communicate easily when you’re online. All you have to do is see which number your channel gets assigned in the chat box at the bottom left of the screen when you join it. For example, if I typed “/join examplechannel” a message would pop up in the chat box that might say “Joined channel: [5. examplechannel]”. To talk in that channel you would just need to type “/5 <your message>”. You will automatically join that channel every time you log on unless you decide to leave it by typing “/leave <channel name>”. Another way to communicate would be to invite everyone in your group to a party.
Tips for Using the Party System
No, not that kind of party. A WoW party. In WoW, the party system allows people to cooperate on various objectives and share in the rewards. For example, if you started a party for questing, everyone would get credit for the quest objectives. Normally, the first person to hit a quest monster is the one that gets quest credit and XP for the kill. If two players are in a party together, they can both fight the monster and both get credit and XP. Parties also allow you to enter dungeons and queue for Battlegrounds as a group, and they have a chat channel of their own.
Communicating With Your Party
In order to talk to the rest of your party, type “/p <your message>”. To invite someone to a party, just type “/invite <player name>”, or “/inv” for short. There is also built-in voice chat for parties. In order to turn on your voice chat, either press your Escape key or click on the computer icon just to the left of your bags on the bottom left corner of the screen. Then, click on “System” in the window that comes up. This will bring up a larger window. Click “Voice” on the right side of the window, and then click “Enable Voice Chat.” Make sure that you set a Push To Talk button in this window if you don’t want the mic to pick up everything you say. However, most people use a third-party program such as Ventrilo, Mumble, or Teamspeak for voice chat. These programs tend to work a little better in general, but you have to pay for a server to use them. WoW voice chat is free.
Locating Your Party Members
One other nice thing about being in a party is that all of your party members’ locations will be marked on the map. If you’re in the same zone, this makes it easy to find each other. But what if you’re not in the same zone? If everyone wants to start as a different race and you want to quest together, it could be difficult to find a way to meet up. (For more information about all this, check out the Wowwiki Travel Guide.)
Questing in Starting Areas
First of all, you might want to get your character to level 10 before you move to your party members’ starting areas (if they’re of another race). The reason is that some of the quests in those level 1-10 areas aren’t available to other races, so while you might be able to find some quests to do, it could be dicey. If that sounds like a lot, don’t worry, the first 10 levels go exponentially faster than any other levels in the game. Literally. The leveling curve is roughly exponential, so those first 10 levels should fly by.
Questing in Level 10+ Areas
That said, if you really want to go hang out in another race’s starting area it should be easy to figure out from this guide. For simplicity’s sake, I’m only going to cover how to get to the main city for each faction and how to get from there to the nearest 10+ questing area. There are four different 10+ questing areas for each faction, but if this is your first time leveling a WoW character, the nearest one will be just as new to you as the other three. First I will cover my preferred faction, the Horde. Lok’tar ogar!
Horde 10+ Areas

Orcs and trolls will have the easiest time meeting up. They both start in the zone where the Horde’s capitol is located, so it’s as simple as following the path north until you arrive at Orgrimmar. Tauren have a slightly harder time getting there, but the Tauren city (Thunder Bluff) is at least on the same continent as Orgrimmar. It should be pretty easy to get to Thundeer Bluff from the Tauren starting area; the city is kind of hard to miss because it’s just north of the village where you’ll get some of your quests as a Tauren and it towers over the rest of the zone. Thunder Bluff is made up of a large central bluff and three smaller bluffs that surround it. The elevator to get up is located on the western side of the main bluff. In order to get to Orgrimmar from the elevator, turn left and take the bridge over to the Spirit Rise. Spirit Rise is the smaller bluff to the northeast of the main bluff. You should see a dock. Simply wait for the zeppelin to get to the dock and hop on; it will bring you to Orgrimmar. Undead characters will have a slightly more confusing trip. If you look at your map, you should see the Undead capitol: Undercity. Just north of Undercity are two zeppelin towers. The zeppelin to Orgrimmar stops at the eastern tower, but there are two docks on this tower. The dock you want has predominately red banners on it, so if you find yourself on the dock with the multicolored banners, just turn around and head to the other side of the tower to get to the dock you want. Blood Elves do basically the same thing, but they have to get to Undercity first. To get to Undercity, you’re going to have to go to the Blood Elf capitol first, Silvermoon City. It should be pretty easy to figure out how to get there if you just look at your map; just make sure that you go in to the east side of the city. The other side, which is labeled “Ruins of Silvermoon” on the map, is entirely separate from the actual city. Once you’re inside the city, look at your map again and find Sunfury Spire. It will be pretty much in the middle of the northern edge of your map. Once you get there, go to the very back of Sunfury Spire and look for the red orb located in the room there. If you right click that orb, it will teleport you to Undercity. Goblins and Pandaren are both incapable of getting to Orgrimmar until they reach level 10 or so. When playing as those races, basically all you have to do is complete quests until the story teleports you to Orgrimmar. Once you’ve gotten to Orgrimmar and met up with everyone, you’ll probably want to go to the nearest questing area.
![]()
Alliance 10+ Areas

Now for the Alliance. Just as the Horde capitol is the main Orc city, the Alliance capitol is the main Human city: Stormwind. As a Human, you can just open your map and use that to find your way to Stormwind City. Dwarves and Gnomes both start in the same zone, near the main Dwarf city: Ironforge. To get from that zone to Stormwind, you have to go through Ironforge. As with Humans and Stormwind, it’s pretty easy to just look at your map and use that to get to Ironforge. Once there, you’re going to want to make your way to the Deeprun Tram, which is located in Tinker Town. Unlike the zeppelin to Orgrimmar, the Tram is marked on the map, so once you get to Ironforge you should just be able to open your map again and make your way there. You just have to turn right from the main gate of Ironforge and then follow the ring around the city until you get to Tinker Town. You’ll know you’ve arrived when everything starts to look a little less Dwarven and a little more…mechanical. This is the Gnome area of Ironforge. Just go into the portal at the back of Tinker Town and you’ll be inside the Deeprun Tram. From here just wait for the Tram to arrive and you’ll be on your way. Night Elves, like the Undead, start on a different continent. By the time you hit level 10 as a Night Elf, you should be pretty close to the Night Elf city: Darnassus. If you’re not there yet, just get on the path and start heading west. Look at your map if you get confused. Once inside Darnassus, take another peek at your map. The area you want is directly west of the main entrance to Darnassus and is labeled “Temple Gardens.” If you go to the westernmost little island in this area, you should see a strange structure that kind of looks like a tree with its roots above ground and a cloud of purple light inside those roots. If you walk into that cloud of purple light it will teleport you to Rut’theran Village.

I hope this rundown on setting your group up to play WoW helps you get into the game. It’s a tried-and-true video game that can be really fun to play with a group of family and friends.
[download file=”http://www.pixelkin.org/wp-content/uploads/2014/04/Get-Connected.pdf” title=”Get Connected: A Pixelkin Guide to Family Gaming”]